

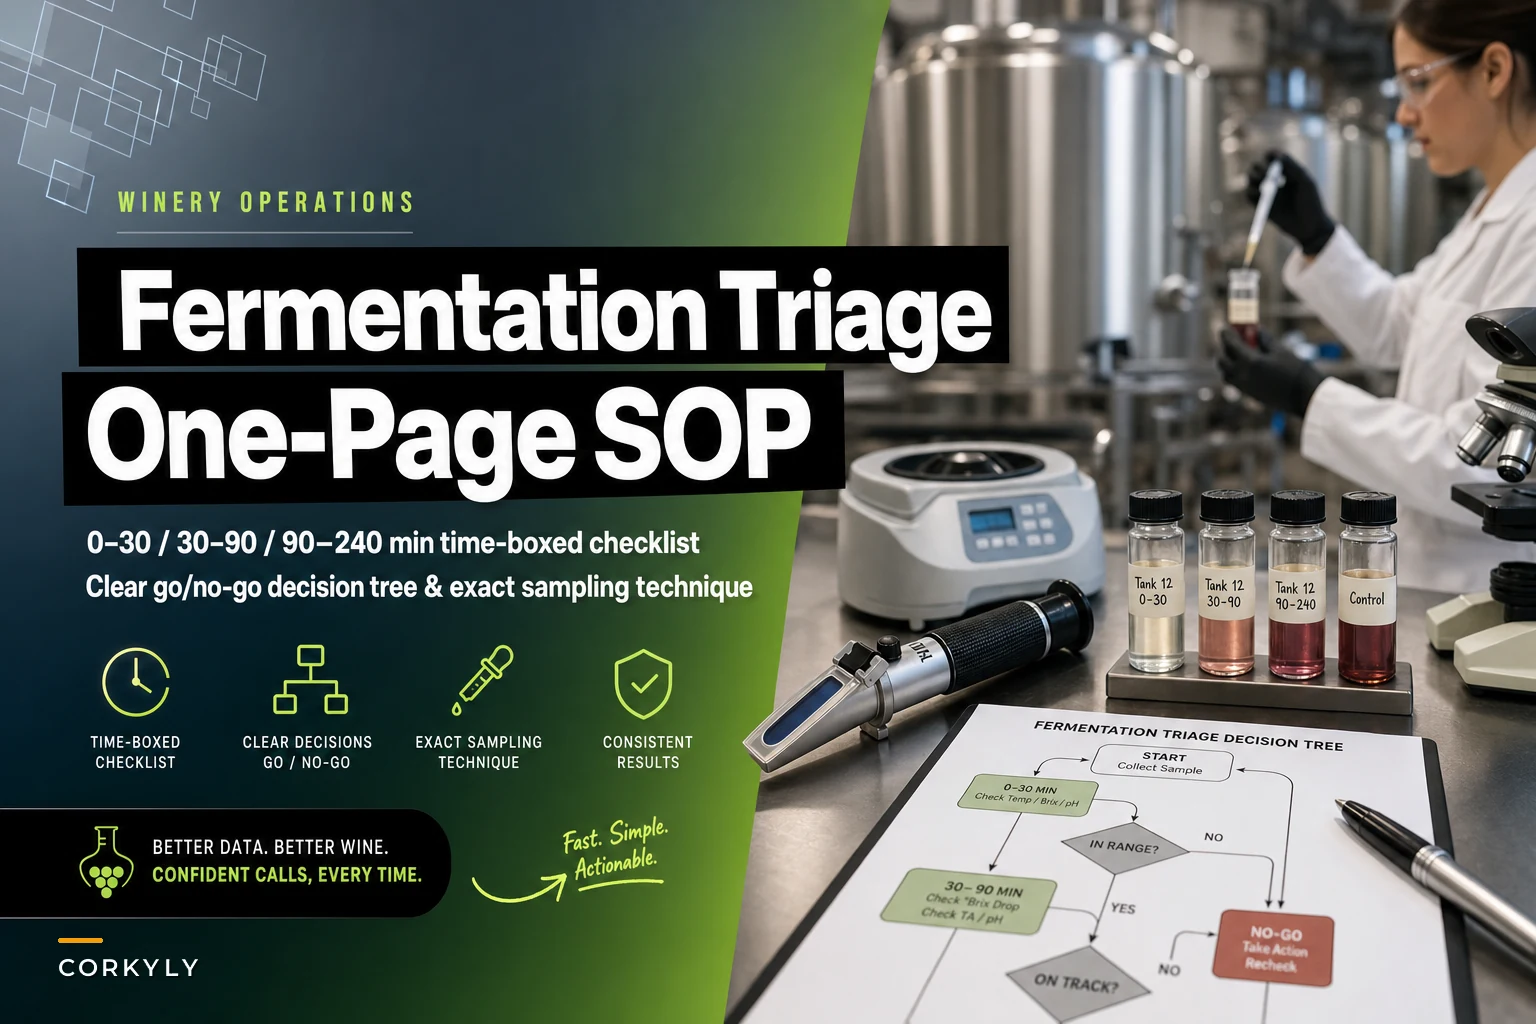

A printable triage tool for when a tank goes quiet and you have one shift to figure out whether it's a real problem or a false alarm.
A stuck ferment almost never announces itself cleanly. What you actually get is a Brix curve that flattens a little too early, a cap that stops gassing like it did yesterday, and a cellar hand who says "something feels off on Tank 7" without being able to explain it. From that moment you've got maybe four hours before the decision window actually matters — because the longer a ferment sits stalled, the more you risk VA climbing, the harder a restart becomes, and the more a 2,000-gallon lot turns into a blending problem instead of a varietal wine.
This SOP is built for that four-hour window. It's meant to live on one laminated page near the lab bench and get used by whoever is on shift, not just the winemaker. If you want the background on sampling cadence and what trend shapes should raise flags in the first place, that's covered separately in our piece on fermentation monitoring SOPs. This is the downstream tool — the thing you reach for after the trend already looks wrong.
The one-page logic: three time boxes, one go/no-go
The whole point of time-boxing is to stop the two failure modes that keep showing up in small cellars. One is the panicked over-reaction — somebody dumps nutrients and warms the tank within the first ten minutes based on a single refractometer reading that hadn't been temperature-corrected. The other is the slow drift, where the tank gets "watched" for a day and a half until the easy fixes are off the table.
| Window | Goal | What you're allowed to do | Who signs off |
|---|---|---|---|
| 0–30 min | Confirm it's real, not an artifact | Read-only checks, one validated sample, sensor cross-check | Cellar lead |
| 30–90 min | Cheap, reversible interventions | Temp adjustment, gentle mix, rehydrated nutrient within dosing limits | Cellar lead + winemaker notified |
| 90–240 min | Escalation decision (go/no-go) | Rescue yeast prep, acid/VA mitigation, or hold-and-document | Winemaker (or delegate) required |
Notice that authority tightens as the clock runs. The first 30 minutes, anyone competent can run. The 90-minute mark is where someone with actual authorization has to put their name on a decision. That matters more than people expect — the most expensive fermentation mistakes usually weren't wrong actions, they were right actions taken by someone who guessed at the dose.
0–30 minutes: confirm the stall is real
Most "stalls" called in during the first read aren't stalls. They're measurement artifacts, a thermowell that drifted, or a ferment that's genuinely slowing because it's near-dry and should be. Your first job is to not create a problem by reacting to a non-problem.
Streamline your winery operations effortlessly.
Corkyly helps you track, manage, and optimize every step from vine to bottle.
- Vineyard & production tracking
- Customer relationship management
- Inventory & sales analytics
No credit card required
-
Pull the last 48 hours of Brix/temp readings and look at the shape, not just the last point. A gentle deceleration near dryness is normal. A plateau at 8–12 Brix is not.
-
Check the physical cap. Still warm? Still releasing CO₂ when you press it? A cap that's gone cold and quiet mid-ferment is a stronger signal than any single number.
-
Cross-check your inline sensor against a handheld. If your tank probe says 14.8 Brix and a fresh corrected refractometer reading says 11.2, you don't have a stall — you have a calibration problem, and you just avoided dosing a healthy tank.
-
Confirm temperature at two points. Thermowell stratification is real; a tank reading 72°F at the probe can be sitting at 64°F lower in the cone.
The single most common first-30-minute mistake: trusting one number. In practice, the "stall" disappears roughly a third of the time once you've done a proper sensor cross-check and a corrected manual sample. Confirm before you touch anything.
Exact sampling technique (this is where people quietly ruin the data)
-
Sanitize the valve. Wipe with 70% ethanol or a KMS solution, open and purge 200–300 mL to waste to clear dead volume sitting in the valve body. That purge volume is not optional — the stuff sitting in the sample valve is not representative of the tank.
-
Valve over thief, always, for active ferments. A wine thief dragged through the cap reintroduces oxygen and picks up cap material that skews your reading. Use the sample valve. Reserve the thief only for tanks where you have no valve access, and even then, go below the cap.
-
Minimize headspace and oxygen. Fill your sample vessel from the bottom, let it overflow slightly, and cap it. You want to avoid aerating a sample you might run for VA or look at under the scope for viability.
-
Handle sample temperature deliberately. Note the sample temp at pull. A warm sample off a 75°F ferment will read differently on the refractometer than the same juice at 20°C.
-
Correct the refractometer reading. Two corrections matter and both get skipped constantly: temperature correction to the instrument's reference (usually 20°C), and alcohol correction — once fermentation is underway, ethanol throws the refractometer high. A refractometer reading during active ferment is not your true sugar. Use a hydrometer for dry-confirmation, or apply your correction factor. Cellars regularly declare a ferment "stuck at 4 Brix" when it's actually dry, because nobody corrected for alcohol and the refractometer was reading ethanol as sugar.
Write the corrected number and the raw number on the log. When you review later, the gap between them tells you whether the floor team is correcting properly.
30–90 minutes: the cheap, reversible interventions
If the stall is confirmed, this window is for the low-risk moves — the ones you can undo or that don't commit you to anything. You do these before escalation because they're often enough, and because a winemaker making the 90-minute call wants to know these were already tried.
-
Viability stain. A methylene blue (or methylene violet, which some find cleaner to read) slide tells you fast whether you have live, budding yeast or a population that's mostly dead. Blue-stained cells are dead; unstained are viable. If you're seeing 60%+ dead cells, nutrient dosing alone won't save it and you're already heading toward a rescue-yeast conversation.
-
Microscopy contamination scan. Under 400x, look for the obvious cues: chains or clusters that don't match Saccharomyces budding morphology, rod or needle shapes that suggest bacteria, or the lemon-shaped cells of some spoilage yeasts. You're not running a full ID — you're answering one question: is the problem a tired population or a contaminated one? Those two paths diverge hard.
-
Off-gas / weight check. If you track tank weight or have a bubbler/airlock cadence, a ferment still losing CO₂ (and weight) is still working, just slowly. One that's gone flat on weight-loss is genuinely stalled. This is one of the most under-used confirmations in small cellars because it needs baseline data — but if you have it, it's decisive.
Reversible interventions, within dosing limits:
-
Temperature nudge. If the tank dropped below the yeast's comfortable range, raising it a few degrees toward the mid-20s°C can wake a sluggish-but-living population. Move gently — a few degrees, not ten.
-
Gentle homogenization. A soft pump-over or mix to redistribute yeast and nutrients, not an aggressive aeration. Over-oxygenating a near-stuck red is how you trade a stall for an oxidation problem.
-
Nutrient, if the data supports it. This one needs real discipline. See the dosing section below.
Validated dosing ranges and cumulative limits
-
DAP / complex nutrient dose within the manufacturer's labeled range for your yeast strain and must-nitrogen deficit. The hard rule most cellars enforce: track cumulative DAP against the regulatory ceiling and your own internal cap, and never add DAP after ~⅓ sugar depletion without a specific reason — late DAP feeds spoilage organisms more than it helps a late ferment.
-
Thiamine / micronutrients within labeled limits; these don't carry the same over-dose risk but still get logged.
-
The cumulative column is the whole point. Your dosing log should show total added this ferment, not just today's addition. When that number is visible, people stop stacking.
A practical pattern: pre-print the maximum cumulative allowance for each common tank size on the SOP itself, so the person on the floor doesn't have to do math under pressure. Math under pressure is where cellars overshoot.
90–240 minutes: the go/no-go escalation
By now you know three things: whether the ferment is truly stalled, whether the population is alive or dead, and whether there's contamination. That's enough to make a real decision — and this decision requires authorization, not initiative.
Decision tree for the 90-minute go/no-go flow follows.
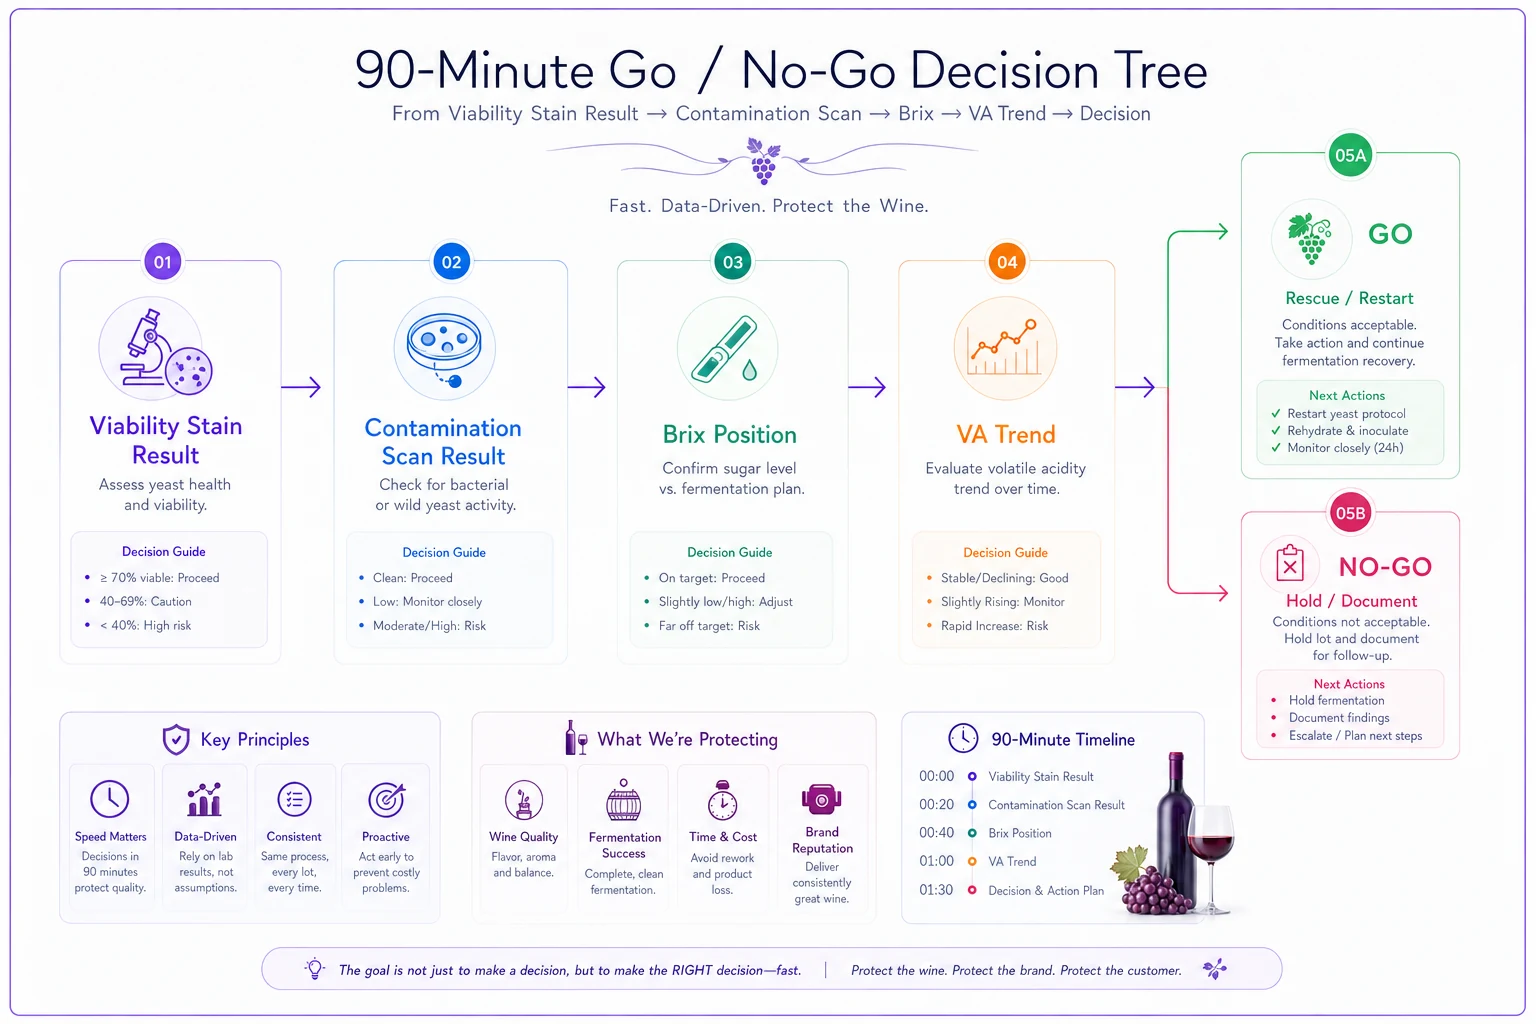
Go / no-go criteria for a full rescue (restart) protocol:
| Finding | Lean toward restart (GO) | Lean toward hold/document (NO-GO) |
|---|---|---|
| Viability stain | High dead-cell fraction | Mostly viable, just slow |
| Weight/off-gas | Flat, no CO₂ loss | Still losing weight slowly |
| Contamination scan | Clean | Visible bacterial load → VA path first |
| Brix position | Plateaued well above dryness | Near-dry, deceleration normal |
| VA trend | Stable | Climbing → mitigation before restart |
The nuance the table can't fully hold: if you see climbing VA and a dead population, a straight rescue-yeast restart into contaminated must often makes things worse. That's the scenario where you want the winemaker deciding whether to restart, mitigate first, or make a blending call. A time-boxed SOP isn't there to replace that judgment — it's there to make sure the judgment call happens at hour three instead of hour thirty.
If it's a GO, your rescue-yeast rehydration and acclimatization should already be prepped — ideally started during the 30–90 window if the viability stain looked bad, so you're not waiting on a two-hour rehydration after you've already decided. If it's a NO-GO, document the reasoning, set the next check interval, and log it. The documentation is the deliverable, because the next shift inherits this tank.
Role and authorization matrix
The failures that cost the most aren't technical — they're authority gaps. Someone capable did something sensible without the authority to own the consequences, or everyone waited because nobody was sure who could sign off.
-
Cellar hand / shift tech Runs 0–30 triage, pulls validated samples, runs floor tests. Authorized to adjust temperature within a pre-set band and perform gentle mixing. Not authorized to dose.
-
Cellar lead Authorizes nutrient dosing within printed cumulative limits. Owns the 30–90 window. Must notify winemaker of any confirmed stall.
-
Winemaker (or named delegate) Required for any 90–240 go/no-go — rescue yeast, VA mitigation, or decision to hold/reclassify the lot. This authorization cannot be skipped because "they were unreachable" — which is exactly why the matrix names a delegate.
Print the actual names and phone numbers on the laminated copy. An authorization matrix with job titles and no contact info fails at 2 a.m. during harvest, which is precisely when stalls get called in.
A realistic scenario
A roughly 15,000-case producer had a 1,800-gallon Cabernet plateau around 9 Brix on day six. The first read came in from the night shift. Without a triage SOP, a similar tank the previous year had sat "under observation" for nearly two days before anyone pulled a viability stain — by then it needed a full rescue restart, VA had crept up, and the lot ended up downgraded into a blend, costing several dollars a bottle across the lot.
This time the shift tech ran the 30-minute checks, caught that the inline probe was reading roughly 2 Brix high, pulled a corrected sample, and confirmed the real plateau. Viability stain at the 60-minute mark showed a still-mostly-live population. Cellar lead warmed the tank a couple degrees, ran a gentle mix, added nutrient within the cumulative cap, and the ferment resumed within the shift. No rescue yeast, no VA spike, no downgrade.
The difference wasn't skill — both crews were competent. It was the clock and the checklist forcing the stain and the sensor cross-check early instead of late.
Keeping the one page honest
A printed SOP drifts the moment reality changes — new yeast strains, a recalibrated sensor, a dosing limit update. The practical fix is treating the logs the SOP generates as data, not paperwork. When sampling, dosing, and go/no-go decisions get captured in the same system you already use for ferment monitoring rather than on loose sheets, the cumulative dosing column calculates itself instead of relying on someone's arithmetic at midnight, and you can actually review after harvest which stalls were real, which were sensor artifacts, and whether the 90-minute window is giving you enough runway. That review is how the one-pager gets sharper each vintage instead of becoming the laminated thing nobody reads.
The SOP's real value isn't that it tells experienced people what to do — they mostly know. It's that it compresses the decision into a single shift, assigns the authority clearly, and makes sure the cheap confirmations happen before the expensive commitments. Pair it with disciplined sampling cadence and the trend-based red flags from the fermentation monitoring SOPs, print it, laminate it, and put a real pen next to it.
The SOP's real value isn't that it tells experienced people what to do — they mostly know. It's that it compresses the decision into a single shift, assigns the authority clearly, and makes sure the cheap confirmations happen before the expensive commitments. Pair it with disciplined sampling cadence and the trend-based red flags from the fermentation monitoring SOPs, print it, laminate it, and put a real pen next to it.
Ready to elevate your winery management?
Join 500+ wineries using Corkyly to increase operational efficiency, boost customer loyalty, and grow sales.